Below is a manual on how to use the Vivenu scan app, this manual contains all the information, from logging into the app to scanning itself.
Is the answer to the question not in this article? Take a look at the following article: General information: scanning tickets
First of all, here is a quick step-by-step plan, then everything will be explained in detail.
- Open the Vivenu app and log in. (Chapter 1 to 3)
- On the scanning screen, select the settings cog in the top right corner. (Chapter 4)
- Click on the event that applies.
- Select individual ticket types by clicking on them or activate All ticket types at the top right to use all ticket types of the event. All active ticket types are marked with a blue check mark. (Chapter 4)
- Click Events in the top left corner to save your selection. A blue check mark will appear next to the event.
- You can repeat this process for as many events and ticket types as you like. For example, you can permanently activate events with a season ticket.
- Click the blue X in the top left corner to complete the process. The downloading of the tickets will then start automatically and the tickets can be scanned.
1. Do I need to create a scan account?
The easiest way to log in to the scanning app is with a token. This is explained in steps 2 and 3. We recommend using a token to log in for scanning.
However, it is also possible to log in with an account. This can be the regular account used to log in to the back office, but a separate account can also be created for this.
Creating an account is done under 'Settings' and then 'Users'.
On this page there is a blue button at the top right of the screen with the text 'Create user', here it is possible to create a new account. The following screen will then appear:

A name for the account can be entered here (we recommend simply naming it the scan account or something along those lines). An existing email address can then be linked to it.
You can then choose a role for this account. We recommend 'Attendee Manager' for this. to use.
To save this account, you will have to click on the blue 'Create user' button. An email will then be sent to the email address that has been entered, so that a password can be created via the link in that email.
2. How can I log in using a token?
To log in with a token (QR code), a token must first be created. This can be done under the 'Access control' tab which can be found under the 'Settings' tab. On this page there is a button 'Open actions' in the bottom right corner, where the following options appear:
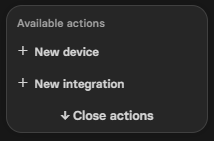
With this choice, click on the option: 'New device', and give your new token a name (for example: Token John Johnson). The following screen will then appear:
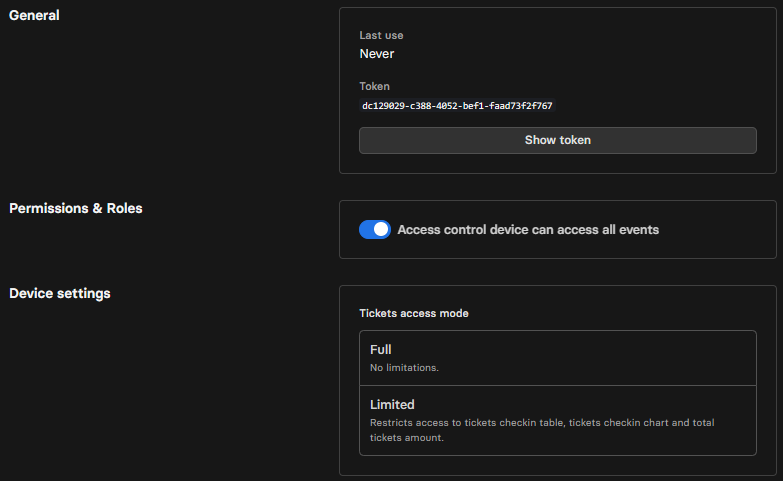
Permissions & Roles
Here the option 'Access control device can access all events' is automatically enabled. This means that the app that logs in with this token has access to all events that have been created. You can then choose via the app for which event tickets are scanned. If you disable this option, the event can already be selected here.
Device settings
There are two options here, option one is to give full access, and the second option is to give limited access. With the limited access option, statistics etc. cannot be viewed in the app.
When everything has been completed, you can click on the 'Show token' button. This QR code can be forwarded to the person who will scan.
3. How can I log in to the app with my token?
The app's login screen contains the 'Scan Token' button below the username and password. Click this button and scan the QR code created above.
The scanner now logs in.
PLEASE NOTE: it is still necessary to select the event and ticket types before scanning can begin.
4. I'm logged in, now what?
When logged in, the following screen will be shown:

Then go to the cog wheel (number 2) first. Here you can select the event, and then which ticket types can be scanned via this scanner. The scanner is then ready to scan. Below is another list of all options found on this page.
Then you are ready to scan, when a ticket is scanned, different colors can be shown on the screen. These colors have different meanings:
Green - the ticket is valid
Yellow - the ticket is valid but already scanned
Blue - someone is checked out
Red - the ticket is not valid or not active in the settings
5. Extra information
1. If there is too little light at the scanning location, the camera flash can be turned on with this button.
2. The event can be set here. The ticket types can also be set here, i.e. which ticket types this scanner accepts. In this way, for example, it can be ensured that people cannot be scanned with their parking ticket at the entrance to the event. (Chapter 4)
3. Make sure the scanner is set to checkin when the tickets of the people arriving at the event are scanned.
4. With the check out option, you could optionally scan all tickets leaving the event. (Chapter 4)
5. Here you can view the details of the person from whom the ticket has just been scanned.
6. By clicking on this image you will return to the scan page.
7. By clicking on this image you will go to the settings of the app.
6. I have logged in with my admin account, what else can I do?
When you log in to the scanning application with your admin account, you have a number of additional functions. Scanning works the same as scanning when you have logged in with a token, but there are a number of extra icons on your home screen, see below:

1. Here you can easily and quickly see how many people have checked in and how many have checked out.
2. Customers can be looked up here. When you click on a name, you will also see additional information such as which ticket they have, their barcode and whether they have already checked in or out.
3. (This option is only available for Apple and not for Android) Here are a number of statistics that are also available on the Vivenu platform.
4. Here you will find the events that you organize. When you click on them you will find information about the tickets sold.
5. The transactions can be viewed here.
Was this article helpful?
That’s Great!
Thank you for your feedback
Sorry! We couldn't be helpful
Thank you for your feedback
Feedback sent
We appreciate your effort and will try to fix the article